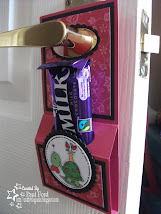
Are you fed up of having to cut out around images with all the fiddly bits? Well with Digi Images, there's no need. It is possible to put them straight onto some digi papers before printing. I'm going to show you how to create perfectly sized topper which will also save you ink as you will no longer need to print out entire sheets of papers.
So this is how I use Microsoft Publisher in my card making.
Firstly open up a blank page in Publisher:
From the task bar at the top, follow the path TABLE; INSERT; TABLE, and this menu should appear:
Change the number of ROWS to 1 and the number of COLUMNS to 1. Click OK and you should go back to your original page with a long slim rectangle. Move the rectangle up to the upper, right hand corner and use the rulers to adjust it to the size you want. For this tutorial I went for 10cm by 10cm to create a small square topper:
Now it’s time to fill the cell. Click on the cell to select it then RIGHT CLICK. Choose FORMAT TABLE and this dialogue box should appear:
You can use any of these options to fill the cell but I’m going to show you how I use digi papers. Choose the PICTURE option and it will take you to here:
Click on SELECT PICTURE and find the digi paper you want to use from the folders on your computer. I’m using a purple swirl paper from Pink Petticoat. The paper you’ve chosen will appear in the middle of the dialogue box. IMPORTANT, you must now click on the LOCK ASPECT RATIO box otherwise your digi paper will be squashed or stretched to fill your cell. Click OK:
And there we have it, one box of digi paper (no longer a need to print a whole page):
To layer on the Bugaboo image, follow the pathway INSERT; PICTURE; FROM FILE and choose the picture you want (I've gone with the Mad Hatter as I think it goes well with the swirls). Make sure you choose the PNG version. Move it to where you'd like it. In the pic below, I have shown you both versions (PNG on the left, JPG on the right). As you can see the JPG version has a white box surrounding it.

Now simply print, colour and add to your card.
* * * * * * *
Layering Images
A few of my latest projects have involved layering images. Here's how I did it.
Again I opened Microsoft Publisher with a blank page. I inserted my PNG version of the Bee Bug Jar first as this is the image I want furthest back:
Next I inserted my Boy Bee image:
I then, simply shrunk him and moved him onto the jar. If you drag over both images, they both become selected and a small box will appear (you can just about see it in the pic):
If you click on this button, it will group the object into one and so you can treat it as a single image from now on. If you want to keep the aspect ratio the same then use the corner resizers whilst holding down SHIFT. What I really like about Publisher is the rulers on the sides. They are so useful for getting things the size I want.
Hope you liked the tutorial and found it useful. Feel free to ask any questions and I'll try to answer them (if I can!). If anyone would like some instructions for how to do this in Word, I have some I can e-mail to you. Just drop me a line and I'll do so.


16 comments:
Hi Paul, firstly good luck in your new job today!
and thank you so much for putting together this amazing tutorial, it will certainly come in useful as im using more and more digis!
love emma xxx
Great tutuorial Paul and very helpful. Can you tell me though is there any way of changing a JPEG to a PNG as all the digis I have are JPEGs.
Good luck with the new job and have fun.
Max x
Great tutorial, I will definately be giving it a go. Good luck with the new job!
Lynn x
Hi Paul your tutorial is brilliant TFS!!!! Good luck with your new job!!
xx
Fabulous Paul, now to give it a try!! Fingers crossed I can do this. Have a wonderful day on your first day on the job!
Able to leap tall buildings in a single bound. . .Paul you are AWESOME!!! Best Bugaboo Stamps tutorial yet - Thanks so much! MWAH!
Paul... this is fab!!! Thanks so much for sharing your high tech computer skills with us!! Well...they are high tech in my book =) I'm so not computer techy =)
Awesome Tutorial Paul!! I'm a HUGE Publisher Fan!!
Happy Days!
Min
Great tutorial! I do everything in Word and never tried Publisher but I think I will know that I saw this :)
Thanks for the template earlier today as well!
Oh, wow- this is really neat. I knew that digi images could be layered, but I didn't know how to do it. Thanks for a great tutorial. Good luck with your new job!
Paul, this is AWESOME!! I guess I'm going to have to go invest in Microsoft Publisher now:) Thanks for such a useful tutorial:)
awesome tutorial Paul, thank you!
This is an awesome tutorial...I have a program that kinda does the same thing with papers and images called scrapbook factory but this is a great tutorial for those with publisher! :) Thanks
Thank you for this tutorial - I've been wanting to use this technique but until now, I had no clue how to do it. Good Job!
Thanks for the great tutorial Paul, been looking for sometghing like this for ages.
Hugs Linda
Paul - you are brilliant!!!!!!! I'm soooo grateful for this tutorial...been wanting to know this for such a long time....thanks so very much :-)
Post a Comment