Welcome to my Wednesday Tutorial. Each Wednesday, the Bugaboo DT share tutorials over at the Catch The Bug Challenge Blog and today is my turn. I was playing about with a strip of card. I always cut up a 12 by 12 piece to craete my card blanks - 4" wide. Makes scoring and mats and layers easy to measure. Anyway, was playing with my scoreboard and a spare piece and came up with this. It's not a new concept but a bit different to what I've seen.

I love the Stella and Gus digis and I know a lot of you do too. They come with the BEST sentiments ever. Make sure you head on over to the BUGABOO SHOP to see the entire collection - there's loads o amazing images there - fantastic characters (Stella, Gus, Dottie, JJ), cute animals, storybook characters, floral designs - you name, Bugaboo has it
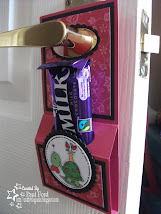
And a side view of the card. As you can see, it's free standing and pretty sturdy. It will also fold flat to go into an envelope.

So what will you need to make one? Here's the list:
4" by 12" piece of cardstock
Scoreboard (not essential as it only involves 3 easy score lines)
Double Sided Tape
A Nestability which is 4" wide or slightly larger
(you could just cut out a rectangle of card though)
Cardstock the size of the Nestie
Items for decoration
Ink which is in this pic is optional

Score the cardstock at 5", 6" and 7" (such easy measurement). If you want to create a square version, score at 4, 6, 8.

Fold as shown:

Next, cut out your nestability shape or cut a rectangle from the cardstockk. I've embossed it and inked it before taking it out of the nesties do add some definition and interest.

Fold it in half.

Attach it to the top of the cardstock as shown. The light green card will act as an insert. It measures 4.5" by 3.5". The sentiment says:
We're one of those retired couples that never argue...
because neither of us can hear what the other is saying

Decorate the front (the green panel is the same size as the inside one)

Now add a panel using 3D foam so that the top of the image overlaps the nestie. This will act as your closure. The nestie tucks behind the panel. I've used Gus and Stella on my panel but it could be anything!

Hope you like this tutorial and give the card a go. If you do, share the results with me so I can see the results.
I'm going to enter this card into the following challenges:
Top Tip Tuesday ~ Open Theme
Scrap Creations ~ Digital Image
Ladybug Crafts ~ Anything Goes
Crazy Challenge - Friendship
(I think the image and sentiment epitomise lifelong friendship)
Make It Monday ~ Anything Goes
Nettie G ~ Favourite Digi
(I just love Stella and Gus right now)
Squigglefly ~ How do you like to use your digi?
Crafty Hos ~ Digi plus Clear Stamp
(PTI stamps used for the Star background)
Kenny K ~ Anything Goes
Stampin Sisters ~ Tone on Tone
(Green Stars stamped on Green background)
Drunken Stampers ~ Tools That Don't Use Electricity


23 comments:
Hi Paul! Fab tutorial, I love this envie-top style tent card, WTG! Hope you are ok, you've been quieter over the last couple of months....take care, and hope you have a Happy Easter. Hugs, Ali x
Fab tut Paul, love it! Im certainly going to give it a go, thanks for the inspiration!
Keryn :)
ps, is the insert loose then?
No it's not loose, just took the pic before sticking them down.
Paul--great tutorial. I'm off to try this now!
What a fab idea Paul ! I've got to try it ! Thank you for a great tut ! Hugs from Catherine
What a fun image and a great tutorial too! Love it and thank you for sharing! Thanks for joining us this week at Stampin Sisters in Christ. Have a wonderful Easter.
Fab tutorial en great creation!
Thanks for joining KKKG this week
Heidy
Wonderful card and image, thanks for the tutorial.
Also, thanks for sharing your creation with Make It Monday.
Second prize is awarded to a randomly chosen comment left for a entry on MIM. Comment must state that entry was seen on MIM to be eligible.
Thnak you so much Paul for a great new way to make a card!
Ah, Stella and Gus ... they ARE wonderful! Of course, you managed to make them extra-special with excellent decorative framing and an outstanding new card design!
Thanks for joining us at Drunken Stampers!
Fabulous card. Stella and Gus are just too funny. Great tutorial. Thanks for joining in the LCI Challenge this week.
Hi Paul,
Thank you for joining us at Stampin Sisters in Christ.What a fabulous tent card, great tutorial.
Wow, Paul, this is fabby! Thx for sharing your tutorial!
Thx for sharing your inspiration with us at Make It Monday and LAdybug Crafts Ink! Hope to see you again!
Mary J x
Very cute card, and great tutorial on a fun fold! Thanks for playing in Squigglefly's challenge!
Paul this card is fantastic. I love your twist on this type of fold. This is also one of my favorite Bagaboo images. Fabulous work on this creation. Thanks for playing with us this week at Going Grey with Scrap-Creations and Good Luck!
Paul, this is adorable!! Such a fun tutorial you shared too!! Thank you!! Such a beautiful creation!! Thanks so much for joining us at the Squigglefly Challenge this week! Smiles, *Vicki* ~ Squigglefly Team Leader
Lovely card that looks like a bag... Thanks for playing with us at Ladybug Crafts Ink challenge!
This is fab! Never seen a card folded like this before - I also thought it was a bag till I realised you'd not put any 'sides' in - had to double check the finished pic again!!!
Love it!
Thanks for joining us over at Top Tip Tuesday this week for our 'Open Challenge' :)
Carol x
excellent idea
Good luck in the challenges, hugs Sarah-Louise My Blog
Designing for:
Crafty Purple Frog , Sweet Pea Stampers ,Bearly Mine Designs and Kenny K
great card. very funny picture and interesting way of bending. Thank you for participating in this week's challenge at The Crazy Challenge.
Fabulous card, thanks for joining us at NettieG's digital gems!
Hugs, Elenor
What a great idea for a card. Thanks for the tutorial, I'm going to have to try this. And, thanks for playing with us at Squigglefly! (again ;-) )
Hallo, habe Dein Blog durch Zufall gefunden und bin gegeistert. Die Anleitung ist super, werde sie doch glatt mal nachbasteln.
Danke, schaue doch jetzt mal öfters vorbei!!!
lieben Gruß
Susi
Post a Comment