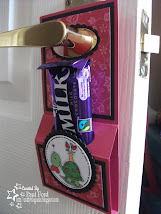
Here's another Shadow Box I've made for two challenges. Cards for Men were asking for a Christmas card (obviously needs to be suitable for a male) and Secret Crafter were after apertures.
The image is again Rudolph from Bugaboo. He is so going to be my go to image for Christmas. I've made a few projects with him which I will share soon.

I also had an e-mail from Lisa asking how I made the shadow box so I thought I'd share a quick tutorial too. This is simply my way of making these, I'm sure there are other ways on the internet too which you could look at but I think this is a nice, quick and easy method.
To start with, I use a 12x12 piece of card for the base (there's enough here to make 2), an A5 piece of card and my image cut down to 4" by 6".

Firstly I cut a strip off the 12x12 in half and then cut it in half again to make to pieces, both 6" squares. Then I use my scoreboard to score at 0.5", 1", 5" and 5.5". I do this to both.

Fold them like this:

Then, from one piece, I cut out an aperture from the central piece leaving a border (0.5" in my case). Then I take the smaller piece of card and cut it to 4" by 6" and cut an aperture from it by creating a border that is 0.75" from each side. Attach this piece to the inside of the other piece. This not only adds a great effective border but also strengthens the front.

Then colour and attach the image piece to the other piece of the base.

Stick both pieces together by taping down the edges and placing the aperture on top of the image one.

To place inside an envelope (mine fits into an A6 envelope), squeeze the edges in and it will fold flatter.
Hope this makes sense Lisa and that you are able to follow it and have a go. If you use this tut and make a project, let me know as I'd love to see your take on it.


8 comments:
You always make everything look so easy, when I KNOW that it's not. . .;) What did you use to "gilt" the edges of your frame? Is that a metallic ink pen? It looks great! :D MWAH!
It's simply a gold border peel off. It has the stars attached and so is really quick and easy.
Paul
Thank you so much for the tutorial ! So clear and precise ! Love your shadow box card, Rudolf is really too cute ! Smiles from Catherine
Gorgeous & fabulous tutorial
Thanks for joining us on SCSC :)
Hugs Jane x
OM Gosh this is adorable!!!
Wow fabulous card, love all the work youve put into it. Thanks for joining us at Cards for Men, good luck with the challenge. With hugs Shirleyxxxxx
Just love your card. How fun, Christmas in July! Wonderful layout. Cute image. Wonderful tutorial. Thanks for sharing that with us. Thanks for joining us at Donna's Den of Crafts. Good luck on the challenge.
Great card. Thanks for joining us over at Cards for Men and good luck with the challenge.
Donna x
Post a Comment