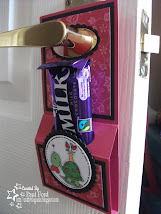
I printed some of this green web paper from Pink Petticoat onto plain white card. Then I put it back into the printer and on the reverse, printed off the same paper but in a grey shade. Then I sent it through the Big Shot to cut it out. It looked great before even decorating it with anything!
Tuesday, 7 September 2010
Halloween Shaker Box
I printed some of this green web paper from Pink Petticoat onto plain white card. Then I put it back into the printer and on the reverse, printed off the same paper but in a grey shade. Then I sent it through the Big Shot to cut it out. It looked great before even decorating it with anything!
Friday, 3 September 2010
Pretty Umbrellas
I digitally layered the umbrella onto some cloud backing paper from Pink Petticoat. then coloured it in, cut the layer out and stuck it onto the backing panel. Quick and easy! So, head on over to the Bugaboo shop and get your hands on this image for free and see the rest of the collection available too!
Tuesday, 30 March 2010
Bugaboo New Release
I then printed the Tubing Bugaboo image and coloured with PMs. The image looks quite faded in these pics but they're not IRL.
Today's release also sees some new TEDDIES and CLOWNS being released. Head on over to the BUGABOO shop and the challenge at CATCH THE BUG for more inspiration.
Saturday, 20 March 2010
A load of ATCs
Sunday, 14 March 2010
Triptych ATC Swap
Our next theme is a colour challenge, either 'Red and Black', 'Yellow and Black' or BOTH!!! Why not hop on over and maybe join in with the fun.
Thursday, 4 March 2010
I Love Digi Challenge #2 ~ Sketch & A Card For Mum


Sunday, 14 June 2009
More Christmassy Cards
I've actually been using some of the Eskimo stamps from Elzybells today. I've adapted a quick card I made a while back on here and played with the image and colours. The main difference is the doodle border.And here's a card I made when I was playing with my new stash that I forgot to include in the update before. Here I was practicing colouring with the ink pad and a blender pen. I think it really adds to it and highlights the flower well.

And my final update for today, here are my ATCs for this months swap over on my ATC SWAPPERS blog. The theme this month is Call of the Wild. These weren't my original plans but I had to change it as my printer is out of action (and has been for 3 weeks now and I'm still trying to sort it out, was adding my new CISS and the printer hasn't worked since). Anyway, enough babbling, I ended up using some PP images I'd printed ages ago and some of my SU stash -Chocolate Chip and Old Olive papers and cardstock and my wheel with chocolate chip ink.
Tuesday, 5 May 2009
More ATCs
Tuesday, 17 February 2009
Simple Card Tutorial
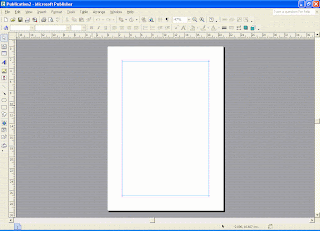
Firstly open up Publisher and follow the path 'File; Page Setup' choose 'Printer and Paper' option and change paper size to A5 and Landscape. The result should look like this. If you don't have the red and blue border then you'll need to change this by going to 'View; Boundries and Guides'

Next click on the 'Insert Table' icon (highlighted in the above pic) and click and drag
from the top left hand corner to the bottom right of the page. The following table will appear automatically. Choose 1 row and 2 columns and then OK.
Here is what you'll be left with, a greyscale table splitting the page in half. This table does not print and so I simply use it as a guide.
Next I import my pictures. For this Tutorial I'm using the Dad's Taxi set. I went to 'Insert; Picture; From File' and then chose the file I keep it in. As they are A4 in size, it appears huge on the page. If you prefer, you can zoom out here to see the whole page.

Click on the image page and you'll see white circles in each corner. Once this has been done a Picture Toolbar will appear (mine appears at the bottom but sometimes it's a floating one and sometimes it's at the top). Choose the CROP icon (highlighted below).
You will notive that the white circles will have changed to black lines. This tells you that it's ready to be CROPPED.
I then use these black lines to remove the items I don't want which leaves just the starry car. Click anywhere away from the image to remove the crop function.
Saturday, 14 February 2009
Card Blank Tutorial


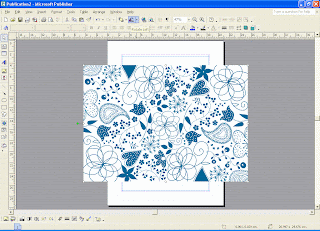
In the above pic, I have used the rotate icon to flip it 90 degrees so that the image is landscape. If you can't find the rotate icon, you can follow the path 'Arrange; Rotate or Flip; Rotate Left. MAKE SURE THAT THE IMAGE HAS BEEN SELECTED AND THAT YOU HAVE THE WHITE CIRCLES IN EACH CORNER OTHERWISE THIS STAGE WON'T WORK.
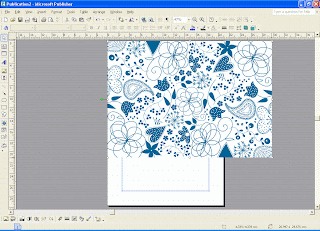
I then drag the image so that the top left of it is lined up with the top left of the paper (does that make sense to anyone else???)

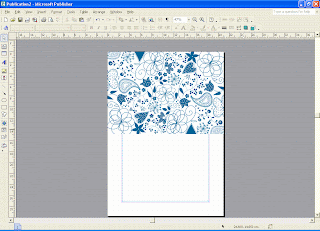
Then shrink the image by clicking and dragging on the bottom right hand white circle (It will change to a two headed arrow to illustrate this). Drag it until the right hand side aligns with the right hand side of the page -I usually make it smaller to start with and then drag it out larger as I find it easier to see the alignment. It should look like this:

Print it out using the borderless function of your printer (I have to change my paper type from Normal to Matte to allow me to choose this option).
I wanted a blue and cream card base but only have the white background option for the Pretty Doodles so I printed it onto a piece of cream linen cardstock.
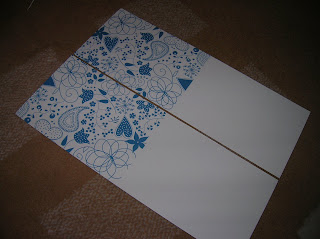
Then simply cut the page in half as shown in the pic and fold
And there we have it - 2 A6 cards which can be used both landscape and portrait and only using 1 piece of A4 card and half the ink of printing a whole page.
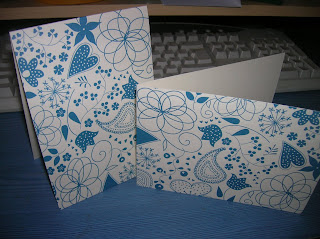
I hope you like my first tutorial on here and I hope to make another one to show how I print a single image to create a simple one layer card as in the thank you cards I made a while back.
_____________________________________________
On a different note, can I thank everyone who sent me birthday wishes and all the great cards yesterday. Sorry I didn't manage to get on the computer yesterday but I will try and post a pic of some of the cards soon.
Thank you
Saturday, 7 February 2009
Valentine Teddy
Tuesday, 3 February 2009
Gossipy Cards
So here are two cards I made with my new found skill (lol). I decided to use my Elzybells stamps and here are the results:
I used the Pink Petticoat Pretty Doodles for the background and coloured the image in with Promarkers (YES, my Memento Ink has finally arrived).
Same image and backing paper, but in a different colour. I've added gold detail to areas of the doodles and inked the sides with chalk.
Here's a pic of the card open to see the difference between the back and front.
Saturday, 31 January 2009
January ATC Swap
Saturday, 24 January 2009
Taxi Milk Carton
Sunday, 18 January 2009
Dad's Taxi
Here we go with some more from this Pink Petticoat set. Lots of nice bold colours to brighten up this dreary day (although the sun has actually come out right now and it looks glorious outside).